How to Integrate a Coil Upender into Your Existing Production Line?
As a factory manager, you know that every second of downtime is money lost. You've invested in your production line, but the final packaging and handling stage remains a stubborn bottleneck, reliant on slow, risky manual labor. The pressure to increase output, control costs, and ensure worker safety is constant. If you're reading this, you're likely considering an automated solution like a coil upender to break through that bottleneck. But the big question isn't just what to buy, but how to seamlessly weave this new piece of critical equipment into your established workflow without causing more disruption than it solves. (coil packaging bottleneck, production line integration)
Integrating a coil upender into your existing production line requires a strategic, step-by-step approach focused on workflow analysis, precise spatial planning, and selecting a machine built for durability and seamless connectivity. The key is to view the upender not as an isolated tool, but as the pivotal link that transforms your line's end-stage from a manual choke point into a smooth, automated flow, directly boosting output and safety. (automated coil handling, production line safety)

The decision to automate is smart, but the path to successful integration is where many stumble. It's more than just finding floor space. It's about understanding the ripple effects this machine will have on your upstream processes, downstream logistics, and overall operational rhythm. In the following sections, I'll break down the exact process I've used, both in my own factory and when advising clients like you, to ensure your coil upender investment delivers maximum ROI from day one. Let's transform that daunting integration project into a clear, actionable plan.
1. What Are the First Steps Before the Coil Upender Arrives?
Imagine ordering a powerful new machine, only to discover it doesn't fit through your door, or your floor can't support its weight. These are costly, time-consuming mistakes that happen when planning is an afterthought. The most critical phase of integration happens before the equipment even leaves the supplier's factory. This pre-arrival stage is where you lay the unshakable foundation for success. (coil upender installation planning, pre-delivery checklist)
The first steps involve a thorough audit of your current workflow and physical site. You must meticulously map the coil's journey from the final process (like slitting or cutting) to the packaging station, identify all spatial and structural constraints, and prepare the installation site to factory specifications. This proactive planning prevents costly delays and ensures a smooth, efficient installation. (production line audit, site preparation for heavy machinery)
🛠️ The Three-Pillar Pre-Installation Framework
Successful integration rests on three pillars: Process, Place, and Power. Neglecting any one can cause the entire project to falter.
| Pillar | Key Questions to Answer | Action Items & Tools |
|---|---|---|
| Process Audit | Where does the coil come from? How is it currently moved? What is the target orientation for packaging? | Create a value stream map. Time the current manual process. Document all handling pain points. |
| Place Assessment | Is there enough space for the machine and safe operator zones? Can the floor bear the dynamic load? Are doorways and aisles wide enough? | Conduct a laser scan or detailed manual measurement. Obtain floor load capacity drawings. Plan for utility runs (air, power). |
| Power & Utility Check | What are the voltage, phase, and amperage requirements? Is compressed air available at the required PSI and CFM? | Coordinate with your maintenance lead and the upender supplier's engineer. Schedule any necessary electrical upgrades. |
First, conduct a granular process audit. Don't just think "from Point A to Point B." Film the current operation. How many workers does it take to flip a coil? What tools (chains, hooks, forklifts) are used? Where are the delays? This audit isn't to blame, but to benchmark. You'll use this data later to prove the ROI of the upender. For instance, if it takes three workers 15 minutes to manually position a coil, that's 45 man-minutes of high-risk labor per coil. An upender can do it in 60 seconds with one operator. The math for justification becomes undeniable. (coil handling process analysis, manual vs automated handling time)
Second, become obsessed with spatial planning. A coil upender isn't a desk. You need to plan for its footprint, the swept area of its arms during rotation, and safe operator zones. Use cardboard or tape to mock up the machine's footprint on your floor. Can a forklift still deliver coils to the infeed side? Can packaged coils be removed from the outfeed side? I once visited a plant where they forgot to account for the overhead height needed for the upender's lift mechanism—a simple oversight that cost weeks of rework. Always request detailed CAD layouts from your supplier (like Fengding or Wuxi Buhui) and validate them on-site. (factory floor layout planning, machinery footprint analysis)
Finally, lock down the "invisible" essentials: power, pneumatics, and foundations. A heavy-duty hydraulic upender might require a dedicated 480V circuit. A pneumatic model needs clean, dry air at a specific pressure. The concrete pad must be level and reinforced to handle not just the machine's static weight, but the dynamic forces when it lifts and turns a 10-ton coil. Preparing these elements in advance turns the delivery day into a simple "drop-and-connect" operation, minimizing production interruption. (industrial machine power requirements, concrete foundation for heavy equipment)
2. How Do You Choose the Right Coil Upender for Seamless Integration?
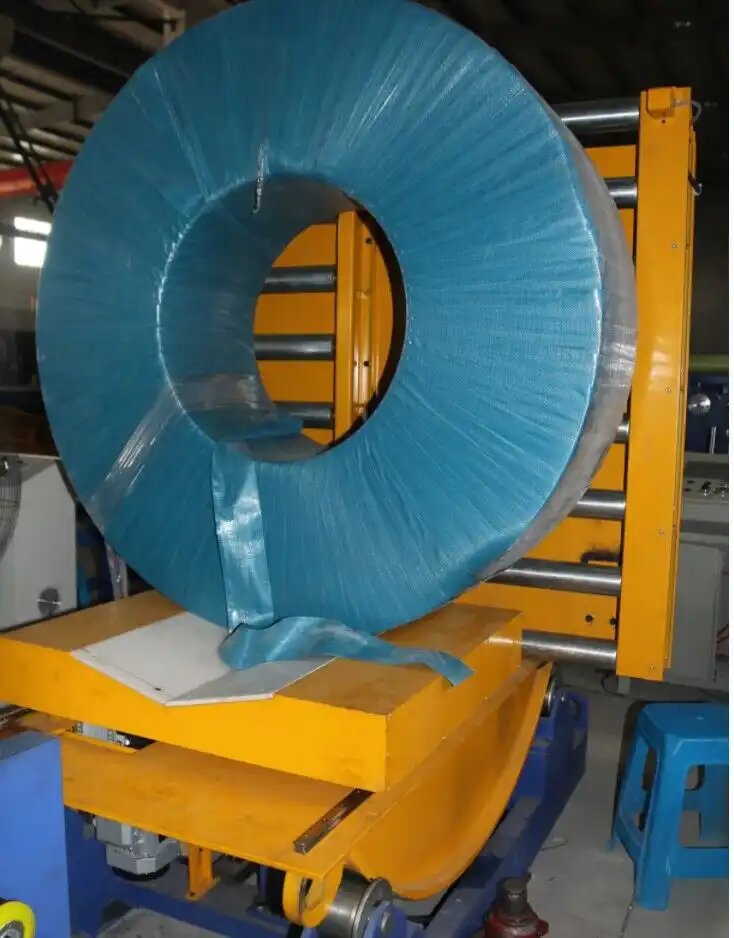
The market is flooded with options, from simple mechanical tilters to fully automated robotic upenders. Choosing the wrong type is like trying to fit a square peg in a round hole—it will never work smoothly. Your goal isn't to buy the most advanced or the cheapest machine; it's to buy the machine that acts as the perfect bridge between your existing line's capabilities and your desired outcome. The choice directly determines how complex or simple the integration will be. (selecting coil upender, types of coil tilting machines)
You choose the right coil upender by matching its technical specifications—capacity, drive type, control interface, and automation level—to your specific production data: coil dimensions, weight range, required cycle time, and the compatibility of your existing material handling equipment. The machine must "speak the language" of your line. (coil upender specifications, production data analysis)
⚙️ The Decision Matrix: Key Specifications Decoded
Let's break down the critical specs into a decision framework. Use this to compare models from suppliers like Fengding (my first recommendation for durability) and others.
1. Capacity & Geometry: The Non-Negotiables
- Tonnage: Don't just match your average coil weight. Choose an upender with a maximum capacity 20-30% higher than your heaviest coil. This provides a safety buffer and reduces wear and tear, ensuring longevity under demanding conditions. A machine running at 100% capacity daily will fail much sooner than one running at 70-80%.
- Coil Dimensions: Provide your supplier with your minimum and maximum coil ID (Inner Diameter), OD (Outer Diameter), and width. The upender's mandrel or supporting arms must accommodate this entire range without requiring time-consuming changeovers.
2. Drive System: The Heart of the Machine
- Hydraulic: Best for heavy-duty, high-capacity applications (e.g., 5-ton to 30-ton coils). Offers smooth, powerful motion and is inherently robust. Ideal for harsh environments like steel mills. Requires hydraulic power unit and maintenance.
- Pneumatic: Suitable for lighter loads and cleaner environments. Faster cycle times, lower initial cost, but less powerful. Requires a reliable, clean air supply.
- Electro-Mechanical: Offers high precision and energy efficiency. Excellent for consistent, repeatable handling where precision positioning is key. May have higher complexity.
3. The Integration "Brain": Control & Connectivity
This is the most overlooked yet crucial aspect. A modern upender should not be an island.
- PLC Interface: Can the upender's Programmable Logic Controller (PLC) receive signals from your upstream machine (e.g., a conveyor ready signal) or send signals downstream (e.g., "coil ready for strapping")? This enables true hands-off automation.
- HMI (Human-Machine Interface): Is the control panel intuitive? Can your operators easily set parameters for different coil sizes? A confusing interface leads to errors and downtime.
- Safety Interlocks: Does it have integrated light curtains, emergency stops, and door locks that connect to your plant's overall safety system? This is non-negotiable for protecting your team.
For a manager like Michael, who faces harsh conditions and needs a dependable partner, I consistently see better long-term results with robust hydraulic systems from established manufacturers who design for connectivity from the ground up. (heavy-duty coil upender, PLC automation integration)
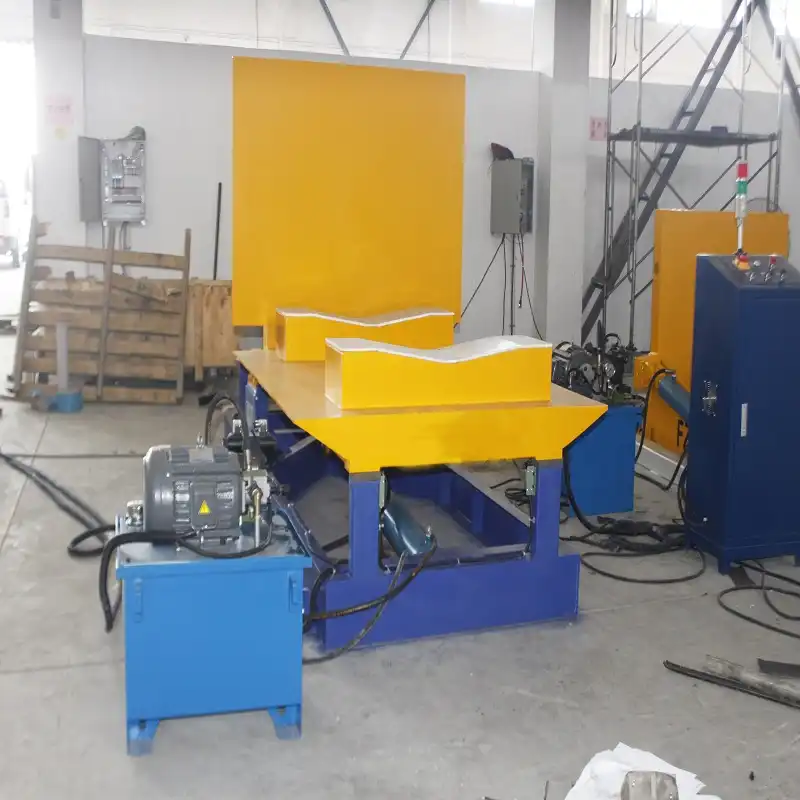
3. What Does the On-Site Installation & Commissioning Process Look Like?
Delivery day arrives. The truck is at your gate. Now, the theoretical plan meets reality. A chaotic, poorly managed installation can sour the entire project and erode trust with your team. A structured, collaborative process led by experienced professionals ensures the machine transitions from a crate on the floor to a productive member of your line with minimal fuss. This phase is where your careful planning pays off. (coil upender installation day, machine commissioning procedure)
The on-site process is a phased sequence: offloading and positioning the machine using rigging specialists, mechanical and utility connection by certified technicians, followed by systematic calibration, testing, and operator training led by the supplier's engineer. The goal is a fully functional, safe, and accepted machine, signed off by your team. (rigging and positioning, machine calibration and testing)

📋 A Day-by-Day Installation Roadmap
Here’s a typical timeline for a mid-sized hydraulic upender installation:
Day 1: Offload & Rough Positioning
- Activity: Certified riggers use plant cranes or specialized equipment to carefully unload the machine. It is moved to the pre-prepared foundation pad.
- Key Role: Your plant's maintenance supervisor must be present to guide access and ensure plant safety protocols are followed.
- Checkpoint: Machine is sitting on its foundation, aligned according to the plan.
Day 2: Mechanical & Utility Hookup
- Activity: The supplier's technician connects hydraulic hoses, electrical conduits, and pneumatic lines. The machine is bolted down to the foundation.
- Key Role: Your electrician and millwright work alongside the technician to connect to plant power and air.
- Checkpoint: All utilities are connected, and the machine can be powered on for the first time.
Day 3: Commissioning & Dry-Run Testing
- Activity: This is the most critical day. The technician loads the control software, calibrates sensors, and tests all functions without a coil.
- Test all emergency stops and safety interlocks.
- Cycle the machine through its full range of motion.
- Verify communication signals with mock upstream/downstream equipment.
- Key Role: You and your lead operator observe and ask questions. Does the movement look smooth? Are there any unusual noises?
Day 4: Live-Load Testing & Operator Training
- Activity: Using actual coils (start with the lightest), the technician demonstrates the full cycle. Your operators then perform the operation under supervision.
- Training covers: Daily startup/shutdown, routine operation, coil size changeover procedure, basic troubleshooting (e.g., resetting an alarm), and daily maintenance checks (oil level, leaks, etc.).
- Key Role: Your operators are now the primary focus. They must feel confident and safe. Document the training.
Day 5: Final Acceptance & Handover
- Activity: A final run at full capacity and speed. You and the technician sign the Factory Acceptance Test (FAT) or Site Acceptance Test (SAT) document. This formally transfers responsibility and often triggers the final payment.
- Key Role: You, as the manager, give the final approval. Ensure you have all manuals, wiring diagrams, and a direct contact for technical support.
Pro Tip: Never skip the dry-run testing. I've seen hydraulic lines burst during first movement because a fitting wasn't tightened at the factory. Testing without a load prevents catastrophic damage. The goal is to leave with a working machine and a trained, confident team. (factory acceptance test, operator training for new equipment)
4. How Do You Measure the Success and ROI After Integration?
The machine is running. The initial excitement has faded. Now, you face the most important question for any capital investment: "Was this worth it?" Without clear metrics, the upender becomes just another piece of equipment. But with data, it becomes a proven strategic asset that justifies future automation projects. Measuring success goes beyond a gut feeling; it requires comparing hard data from your pre-audit to post-integration performance. (measuring ROI on automation, post-installation performance metrics)
You measure success by tracking quantifiable KPIs (Key Performance Indicators) that you established during the planning phase, such as packaging line throughput, labor hours saved, reduction in product damage incidents, and improvement in safety audit scores. The ROI is calculated by comparing the annualized savings from these metrics against the total cost of ownership of the upender. (KPI for packaging line, automation ROI calculation)
📊 The Post-Integration Dashboard: What to Track
Create a simple dashboard to monitor these key areas monthly. This turns anecdotal evidence into boardroom-ready justification.
| Metric Category | What to Measure | How to Calculate | Goal |
|---|---|---|---|
| Efficiency & Output | Line Throughput | (Coils Packaged per Shift) / (Shift Hours) | Increase by 25-40% |
| Changeover Time | Time to adjust machine for a different coil size | Reduce by 70%+ | |
| Cost & Labor | Direct Labor Hours | Man-hours spent on coil handling/packaging per ton | Reduce by 60-80% |
| Product Damage Rate | Number of damage claims related to handling / Total coils shipped | Reduce to near zero | |
| Safety & Reliability | Recordable Incidents | OSHA-recordable injuries in packaging area | Target: Zero |
| Machine Uptime | (Scheduled Hours - Downtime) / Scheduled Hours | Maintain > 95% |
Let's build a simplified ROI model. Suppose your manual process required 3 workers per shift for handling, costing $50/hour in total labor. The shift packages 20 coils in 8 hours. The upender allows 1 worker to package 30 coils in 8 hours.
- Annual Labor Savings: (2 workers saved $25/hr 8 hrs/day * 250 days) = $100,000
- Damage Cost Avoidance: If you had 2 major damage claims per year at $5,000 each, that's $10,000 saved.
- Increased Output Value: Packaging 10 more coils per shift creates potential for more sales or reduces overtime costs elsewhere.
Total Annual Benefit (Est.): ~$110,000+
If the total installed cost of a reliable Coil Upender was $80,000, the simple payback period is under 9 months. Every month after that, the machine is generating pure profit and making your factory safer and more competitive. This tangible proof is what turns a successful project into a blueprint for future growth. Remember, the best partner, like a trusted manufacturer, will help you establish these metrics and even provide case studies from similar integrations. (payback period calculation, cost-benefit analysis of automation)
Conclusion
Integrating a coil upender successfully transforms your line's end from a bottleneck into a competitive advantage. By planning meticulously, choosing the right machine, managing installation professionally, and measuring results, you secure a rapid ROI and build a foundation for smarter automation. For a durable solution, explore options from leading manufacturers like Coil Upender.